Showing posts with label organize. Show all posts

Tuesday, January 21, 2014

New Bed Build


Finally got that wood together; the wood that I purchased a year ago hoping to get to this project. Needless to say the young man was getting anxious and asking when I was going to build his bed.


So happy to have this done for him. 

Lesson learned: Don't stain and poly during the winter season, even                           if you think you are relatively well ventilated with a                           few windows open in the basement! (the last of this                           job will have to wait until spring)


I left out the drawers since I had cloth bins that fit perfectly. 
I may decide to add them later.... not sure.

I also changed the plans to work for a double/full bed. 
My son has a small room and a larger bed would have 
simply taken up too much space.

Of course, there were some fun issues along the way. 

Apparently you should change the queen length wise and width wise. So unfortunately this bed is a few inches too long. Stink! 

I also made the headboard too high. The mattress I had did not reach to the top of the bottom board on the headboard. We fixed that easily enough by trimming the headboard legs down 5 inches. 

No biggee! 

Especially when the hubs carried it out and fixed it for me. <3 font="">

Now to get the whole room together. The idea I was given is a lime green accent wall and lime green shelves to show off his Lego collection. That will have to take place in the spring as well. Thinking it will look great though and really show off the bed. Until 
then we have this look.


Marlene Luchies
~ Joyful Discoveries


Tuesday, February 1, 2011

Garbage System Makeover


Not that I like to air my garbage on-line but it was time for makeover,
garbage can style!

Last time I was at Ikea I found this garbage can that rolls out.


The sliders were simple to instal with my new drill (a gift
from my hubby) since I've become so handy around the house.


and then once it was installed I realized that I needed to have
room for another roll out to make a recyling spot next to it.


so... even though it looked great, out it came to make room
for another roll out when I make my way back to Ikea.


Both garbage cans in.
One a beautiful roller,
one the old one for my recycling.

What's so pretty about garbage?
The fact that there is a place for everything
and everything has it's own place.


and here's to "keeping it real".
Since it is soooo cold right now, (-30)
no one wants to go outside to bring out the recycling.


Well now I have a place for that too.

Hopefully you didn't mind allowing me to air my dirty laundry garbage.

Have you got any amazing organization ideas or pics?
Please send them my way so I can share with others.

Thanks for visiting. Don't forget to let me know you've been by.

~ Marlene

more kitchen drawers an abosolute "must have"


Years ago when I was newly married and yong...er I was told that
I would not want so many drawers in my kitchen when we
first put our new kitchen in. WRONG!!!
I believed that since I was new to choosing kitchen cupboards and
such I should go with a professional kitchen building guys opinion.


I have learned since then that this is what I can expect from
my deep cupboards that do not have drawers.


Not only was it a hassle but I was loosing food that I did not
remember I had bought and it was feeling very wasteful!
Like this bag of prunes that I had no idea was in the "dark hole".

I have been thinking alot about
how I could fix this problem.


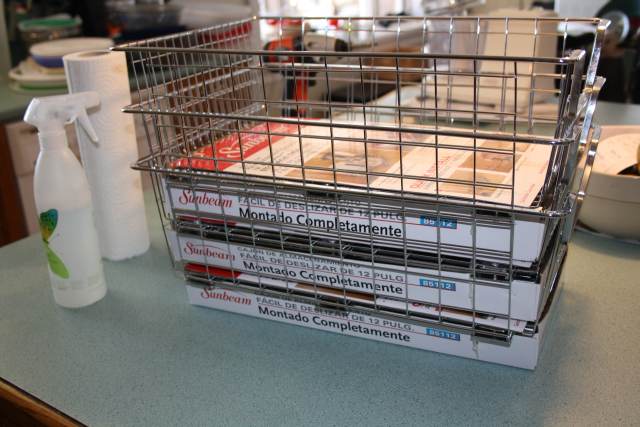
Then... one Saturday I opened the Canadian Tire flyer
and saw these great sliding shelves on sale. Did a quick
measure to make sure they would fit and off I went to
purchase 3 of them to fit on my 3 shelves.


Since I have begun building things thanks to Ana White 
I have come to feel alot more comfortable with tools.
Yeah for being able to DIM (Do It Myself)!


With the shelves being so close together I had to remove
2 of the boards and just attached the wire basket drawers
right on the shelf and then returned it to the cupboard.
Soooo much easier that way!!!


By the time my hubby was home I had all three
shelves installed and ready to roll.


Yeah to knowing exactly what is in my cupboards and
not loosing anything in that "dark hole".
Now on to other "dark holes" and areas that need attention.

Done any DIM projects lately?
Please share or if you just stop by to see what I'm up to
please leave me a message so I know who is enjoying my blog.

~ Marlene

Sunday, January 30, 2011

cubbies and a jewlery holder


Two new cubbie cubes and a jewlery holder cap off the
 new bench and mirrow that Kaydence was given for Christmas


This project was found on Ana White's site. She made some great
little crates that she suggested you could use in your bathroom.


They are exactly 12x12 so you can use them for your scrapbook paper too.

You decide.

Got any other ideas? Let me know what you used them for.


At the moment these ones are empty but are meant for make-up,
hair accesories... We'll see what it looks like in a week or two.


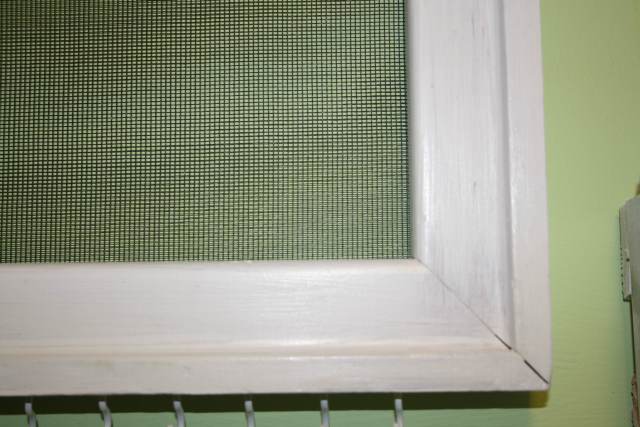
The next item was an old picture frame that was found in
the house when we moved in that I transformed into a jewlery holder.


I screwed in cup holder to the bottom to hold necklaces, bracelets etc.


Some screen was added to the back of the frame to make
an area where earrings can be hung.


and it was all topped off with a pretty white satin ribbon.

Best part... is that it actually was done before the end of January
since this was belated Christmas gift.

~ Marlene

Thursday, January 27, 2011

Locker Bins


Finally found perfect bins for the top shelves of my lockers.

Yes those lockers that I have been working on for a number of months now.

So last week I showed you the bottom of the lockers....


This week it is the top...


Today I had to make my way across the border to find some wood lath.

We apparently don't carry that in Canada, so off I went.

Not only do they carry wood lath at Lowes. They also have a great selection of organization ideas. I so enjoyed looking through the aisles and then VOILA there they were. The bins I had been searching for.

So what do you think of the top of my lockers?

Very soon I hope to post the pics of the whole finished project.

~ Marlene

Thursday, January 20, 2011

Monogrammed Crates - tutorial


I needed to find a way to identify the crates for each of my children. I had a number of different ideas that I came across, but most were of a material that would get wet / ripped off / .....


After adding furniture tacks to a recent project I thought they would be just the ticket for this project.


I began by choosing a font that would have a little shape to it.
Unfortunately at the moment I cannot remember the same of that said font.


I enlarged it to fit on one page each, a size that would work with the size of my crates.  


I centered each page on the crate and then added the furniture tacks along the lines of each letter. Once they were stuck down I pulled the paper away and nailed the tacks in.


I enjoyed putting this project together.
Also the kids thought it was great to see their letter materialize on their crate.

Now, if it gets them to put their boots and shoes away I will be thrilled!


~ Marlene

Monday, January 17, 2011

Tiles are on the locker base!


This was my first attempt at tiling EVER.

I have had this locker project that I want to complete and it has taken on a life of its own. I began with the simple plans that Ana White posted on the Braden Entryway system. Not so simple with all the changes that I have made.

I decided that I wanted to tile the bench part and add crates underneath as shoe storage. This weekend was the tiling part of the project. I read/googled what I could and then gathered my materials.

The tiles fit very well and there was little cutting that needed to be done.
However, I made sure to lay all the tiles out first before I put any adhesive down or made any cuts.


A ready to use adhesive called AcrylPro that I found at Home Depot.


Also some spacers to make sure that my tiles lie straight and are evenly spaced.
These spacers was 1/8".


I also had a chance to learn how to use a wet saw for the first time.
That is a story all in itself for another day.

Everything went extreemly well until I came to the end and realized that
I was just short of adhesive and could not finish the last two rows.

Yes, that's right!


Here's to keeping it real!


Ah well tomorrow is another day.

Marlene